Cut & Paste Sketch Cards

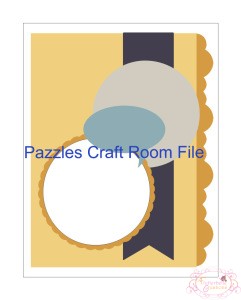
Today I’m sharing with you a couple of masculine cards I whipped up with the help of one of the cut & paste sketches from a little while back. The speech bubble card sketch appeared on the Pazzles blog in November 2013, and these sketches are fantastic when you’re stuck for a design layout or need something quickly.

I have a confession – I struggle with masculine layouts and cards. I find myself fussing for ages about the colours, the layout, the embellishments…..girls are so much easier!!! That being said, I also enjoy a challenge, so creating cards using this layout is an absolute cinch once you’ve chosen your masculine papers!

Speech-Bubble-Card

This is what the sketch looks like (left). You can use a pre-made card, or cut one out yourself with your machine and then add these elements to your base.

I had every intention of cutting out every piece from this sketch and then when I went through my paper stash found the little bag of Kaisercraft Collectables from the ‘Garage Days’ collection. Some of the elements in there were perfect for this card. So I didn’t end up cutting the speech bubble or the decorative edged oval.

The co-ordinating paper stack is perfect for card making so I just flicked through that and pulled out a few pages that took my fancy and looked good together.

This card was so quick to put together that I cut two sets in different papers and made two cards! Now I’ve got a spare for when I need it.

Garage Days sketch cards both_collage

I hope I’ve inspired you to go through the Pazzles Cut & Paste sketch files and create some quick projects today. I’ll be making more cards using these handy sketches!

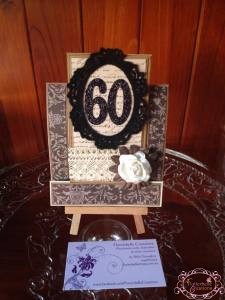
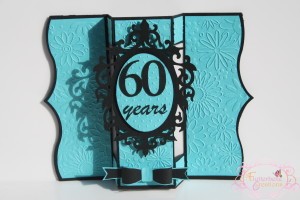
Side step 60th Birthday Card

I am loving the Fun Folds Collections in the Pazzles Craft Room – they are the only cards I’m making at the moment. They really do add that extra pizzazz that often the recipient isn’t expecting.

The versatility of these cards bases mean you can adapt them to suit any occasion by carefully choosing your themed papers and embellishments.

Another reason I purchased a Pazzles Inspiration (superceded by the Vue) several years ago was so I could make my own embellishments and not be left with drawers of ‘stock’. When I need something specific, I create it in the colour, shape and size I need it to be.

This particular card I created to fit in with a colour theme of their gift and wanted it to be classy.

Your 60th Birthday is a special one and so receiving beautiful cards is part of it.

ann's 60th birthday card

I had the felt frame in my stash of supplies and dragged out the black glitter paper to create the ’60’. The glitter paper cuts really well on the Pazzles Vue. The patterned pieces I cut with the machine too and then added a couple of simple embellishments in the lace, flowers and some pearls and I was all finished.

The recipient of this card was very happy and loved it. I love hearing when the recipient of one of my cards loves it and cherishes it to remind them of their special day.

I specialise in custom cards made to your specific requirements. All you need to do is send me an email or give me a call to discuss.

Thanks for reading – I’ll be sharing some more projects with you soon.

In the meantime, be sure to follow me on Pinterest and Happy Crafting.


Quick & Easy Projects

I created two quick projects recently for my monthly Pazzles assignments. One for organisation, and one a home decor project.

The Pazzles Vue is fantastic for creating anything your heart desires, and don’t feel bad if you’re only using it for simple projects. That’s the best place to start. The more involved projects will come in time.

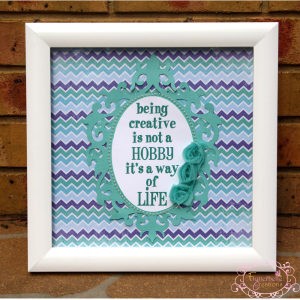
A great way to personalise a space at home is with quotes that mean something to you. In the Pazzles craft room there is a treasure trove of files that you can use to in a variety of ways.

My craft room decor quote  was simply created by using one of my favourite files which is the vintage frame. I enlarged it so it would fit onto a full 12×12 inch page. I cut out the oval piece in white and simply printed onto the white oval. With a few simple embellishments and attaching the frame to a patterned page, my project was complete. The frame I used was a bargain find at KMart for $16 and has a great little stand on it so you don’t have to hang it on a wall.

favorite-things-framed-quote


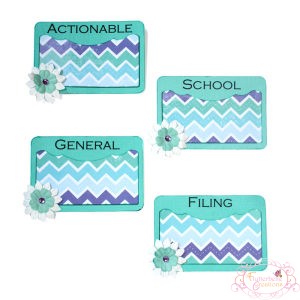
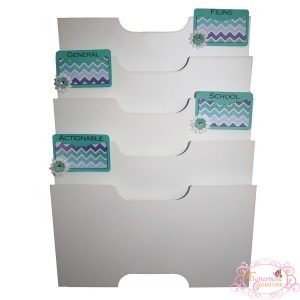
My second quick project was my file labels for our family command centre, where we have our calendar and notices. Our Home Paperwork Station is helping to get rid of clutter on the kitchen bench.  I purchased a magazine file from IKEA and wanted to make it clear which documents belonged in each section. I had considered using vinyl and then decided that small file cards would do the trick and enable me to quickly change them around if I needed to. With some simple embellishments, these became cute little signs for our files.


decorated-file-cards


decorated-file-cards1


Thanks for stopping by. Stay tuned for more posts to come.

Birthday Present Cards

I’ve found a file in the Pazzles Craft Room that has become my go to file for kids birthday cards at the moment – it’s fun, it’s simple and it’s different to what the kids usually receive.

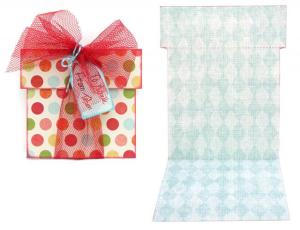
This is the image you will see in the Pazzles Craft Room which is free to members or available in the Pazzles Store. Click here to go right to the file now.

Present-Card_001


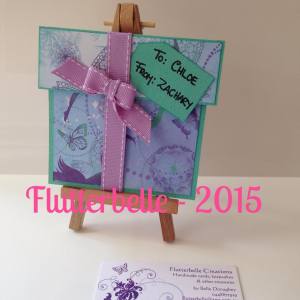
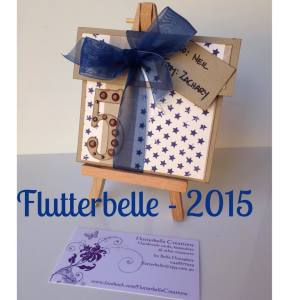
I’ve been using it with a cardstock base and then cutting patterned paper for the top flap and the front section. I’ve handwritten the gift card and then added a coordinating ribbon around the present and sometimes a number resembling the birthday boy or girl’s age.

Here are a couple of my recent projects. I’m planning on making batches of them to sell too, so if you’re interested, feel free to email me to order some. I’m also planning on making some that are a bit more heavily embellished.

Chloe's birthday card

Neil's birthday card

There are so many fun papers available to decorate these fun present gift cards in any theme you can think of.

Visit my Facebook page for more fun cards.

Email me to order some cards to have on hand for when you need them!

Don’t forget to follow me on Pinterest which is a haven of inspiration!

Pazzles Holiday Hop – Christmas Cottage Bendi Card

Pazzles-Holiday-Hop

Welcome to the Pazzles Holiday Hop! Thanks for popping on over to my blog after reading about Heidi’s terrific project.

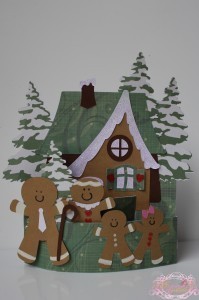
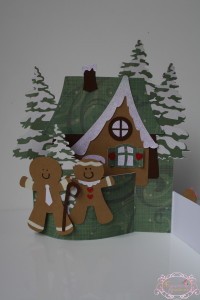
This is my first Bendi Card and I’m pretty proud of it! Using the small bendi card base file which consists of 3 basic pieces I cut these out in plain white cardstock and then followed up with a patterned green paper to lay directly over the white. The white cardstock provided strength and the patterned green paper gave the card more depth. Cutting the patterned paper alone, the card would not have stood up properly as it’s lighter paper. To sit properly you’ll need good strong cardstock.

Christmas Cottage 2

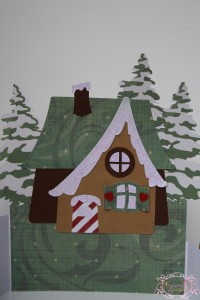
I chose the Christmas Cottage as my main file and cut out each piece before piecing the whole thing together. Some Winter Pine Trees from Miss Kate Cuttables in the background, and the little gingerbread family are so cute!

I used white paint for the details on the gingerbread people to give a more authentic look of the white icing being done freehand. I did cut out the Dad’s tie and the mum’s collar in white cardstock.

C.Cottage 1st layer open

Once I knew exactly where I was going to be placing all my pieces I glued everything in place and added KindyGlitz to most things snow looking and the windows.

These cards look amazing with the three layers and can be adapted for absolutely any occasion.

C.Cottage open

Leave a comment for your chance to win a $30 Pazzles Gift Card. Leave a comment on each of the blogs by Tuesday December 9, 2014 for more chances to win. One lucky commenter will be chosen and notified on Wednesday December 10, 2014.

Terms and Conditions: Open only to people aged 18 or older. Giveaway ends midnight MST, December 9, 2014. Only one entry per person per blog please. One winner will be chosen via random drawing. No purchase necessary. Void where prohibited.

I’m so glad you stopped by for our little holiday blog hop – it’s now time to hop over to Joanna’s blog to see what she has created. Good Luck!

Just in case you get stuck or want to link to another blog you’ve already visited, here are all of the links in order –

Melin – My Paper Crafting

Heidi- It’s What I Do

Belle – Flutterbelle Creations – you’re already here!

Joanna – I Love to Cut Paper

Michelle – Bits & Pieces Paper Lab

Klo – Scrapping Klo

Krista – Krista’s Paper Cafe


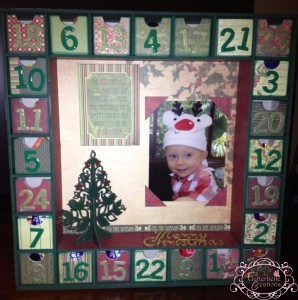
Christmas Countdown Calendar

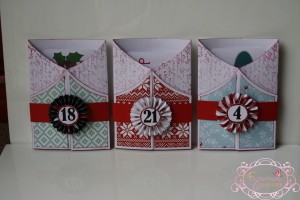
I recently completed a countdown calendar project for the Pazzles Design Team.

I have seen so many different advent calendars I’d like to try making, it was really tough to decide which one to make for this assignment.

3 countdown cards white background

Search for countdown or advent calendars in Pinterest for loads of ideas!

I already made a cute advent calendar a couple of years ago using the Kaisercraft Beyond The Page Advent Calendar which has little drawers for sweet treats. We change the photo each year to keep it fresh.

63093_216366008498304_2001628334_n

I didn’t want to make another one that involved sweet treats, so thought one that housed a whole heap of family based holiday activities would be better.

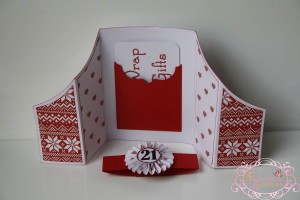
One afternoon, I had a light bulb moment where I realised I was going to use the gate fold card from the first Fun Folds Collection. I’ve used this card quite a few times, but each time haven’t used the band around them.

Please visit the Pazzles blog to read in more detail how I created this project so you can make your own with activities that suit your family holiday beliefs and your lifestyle.

Countdown # 21 open


Here are the 25 activities that are in our calendar – now I just have to sit and order them to suit our busy December schedule!

1. Drive around to see the Christmas Lights

2. Trim the tree

3. Write letters to Santa

4. Play & listen to Christmas Carols

5. Read a Christmas Story

6. Write Christmas Cards

7. Make Christmas Craft

8. Christmas Baking

9. Make Reindeer food as kinder gifts for the children

10. Make Christmas Cookies

11. Wrap presents together

12. Decorate a Gingerbread House

13. Visit Santa for photos

14. Watch a Christmas movie together

15. Game night

16. Have a picnic by the Christmas Tree

17. Write the family newsletter

18. Make ice – cream (it’s summer here!)

19. Make holiday play dough (Christmas scented)

20. Go to a Christmas Event

21. Make cinnamon scrolls

22. Make & wrap teacher gifts

23. Put up the Christmas wreath

24. Decorate the house

25. Write a Christmas wish & hang on the tree

Thanks for reading! I’d love to hear about your creations. Leave a link to your blog or website in the comments below.

Baby Shower Card

One of my dear friends is having a baby, and to say I’m super excited for her is an understatement.

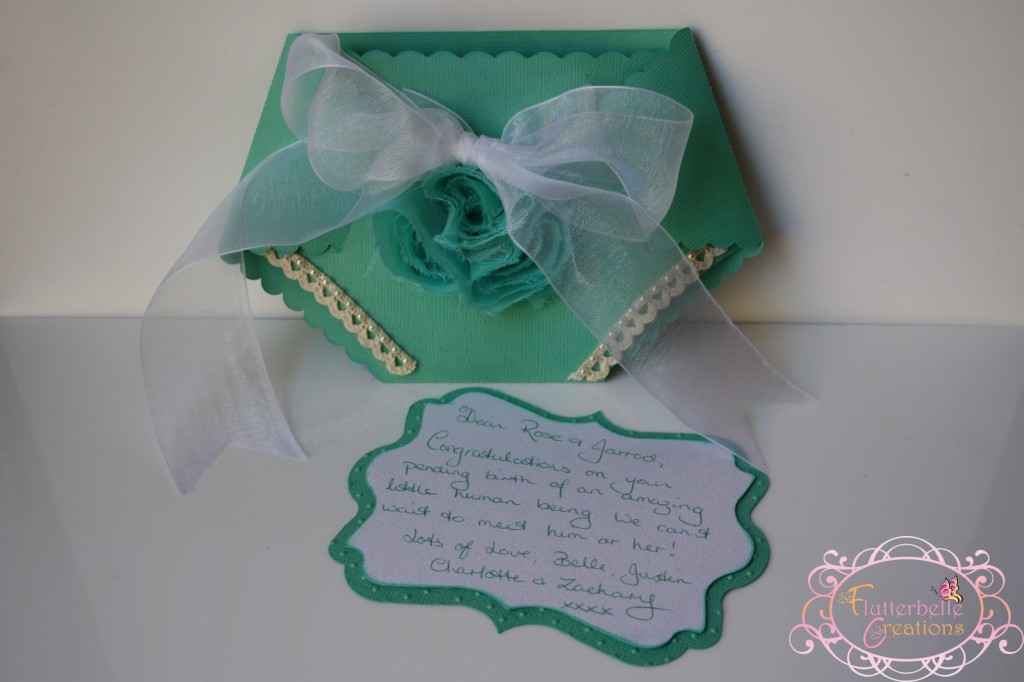
To celebrate her baby shower today, I knew I had to use the baby diaper invitation file from the Pazzles cards & tags CD available in the Pazzles Store.

This file cut out in a snap, and folding it together was so easy.

I chose a beautiful teal colour as we don’t know the baby’s sex yet, and decorated simply with a white ribbon, teal flowers, some lace and pearls.

IMG_9318 (2)

Instead of just a plain rectangle card insert, I chose one of the scallop mat files and created an outline for it so I could cut a contrasting colour card to have two layers.

The bottom, coloured layer I ran through my embossing machine and then chose a plain white card for the top layer which I wrote on.

Card finished! As easy as that!

Thanks for stopping by.

Fun folds card collection

August is an incredibly busy month for us in terms of Birthdays and so this means many cards to make. I am probably my own worst enemy at this time, because I rarely create the same card twice. I like to make original designs.

This time, I was sensible and used a design I’d created earlier in the year and tweaked it for this special birthday.

The fun folds collection is a terrific cutting collection available free to Pazzles craft room members, or available in the Pazzles store. They are different to what many other people give and receive for their special days and they are so versatile.

I have most of my cards featured on my Facebook page for you to browse and have created albums based on the design.

The teal and black looked absolutely stunning when it all came together.

IMG_8814

The bow at the base of the card was created using the dimensional bow file from the Pazzles craft room.

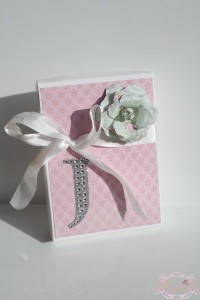
Once complete, and my message written on the reverse of the card I popped it into a card box and went to work decorating the box. I used an embossed sheet of cardstock from a paper stack (Kaisercraft Bonjour) to cover the lid and added the rhinestone letter “J” in the bottom left corner. The 3D rose I had made previously, and thought it matched beautifully with the embossed paper. I closed the box up neatly with a white ribbon and my card had a beautiful box to keep it safe and to present it to Julie.

IMG_8823For my blog entry with Pazzles – jump over to their blog here and have a look around at all the other amazing projects created by the team.

Thanks for reading and I look forward to sharing more projects with you soon.


Elegant High Tea

A dear friend of ours celebrated her 60th Birthday last month and we were hosting a high tea in her honour. The event has been postponed until later this year, but that’s a long story! On the upside, this gives me more time to create more fun décor!

I wanted to wait until we’d had the afternoon tea before posting photos of my projects, but because of the event being postponed, my projects have already appeared on the Pazzles blog! So now it’s my turn to share in more detail how I created them.

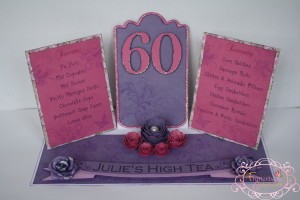
The menu display uses the Triple tag easel card file from the Pazzles Craft Room and I increased the size to make it a great centrepiece for the celebration.

Triple Tag Easel Card - High Tea

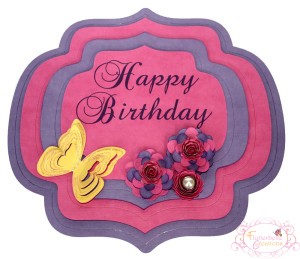
In addition to the  menu centrepiece I created a birthday sign too. When we do get to hosting the afternoon tea, I will stand the sign up on a tissue paper pom pom that’s been puffed out only halfway. This way it sits flat on the table and creates a nice base for the sign. I’ll post photos when that happens! The layered flowers and twirled flowers are so easy to use, and make decoration so easy.

My birthday sign appeared here on the Pazzles blog. Spellbinders-Birthday-Card

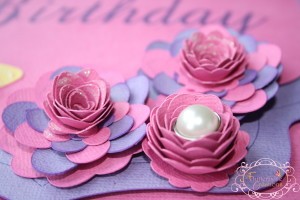
flower close ups spellbinder project

I used the Spellbinder digital dies and deleted quite a few layers leaving just a few. I enlarged these so the finished project was approximately 12×12 inches.

Before I cut out each piece, I used the embossing tool and then the pen tool to draw in the embossed line. This defined the borders on each layer.

To dress it up, I added some twirled flowers also from the craft room and added some Kindy Glitz and a pearl brad for decoration. The pale yellow 3D butterfly looked pretty too.


Do you have a special occasion coming up that you’d like to create your own décor for? Browse through the Pazzles Craft room and think outside of the square to come up with some truly unique party décor. I love to look at how I can use a file differently, or pull it apart and put a new spin on it.

I will most likely be making a few extra pieces when we host this event, so I’ll post them up too.  Until then, thank you for reading.


Reindeers are better than people……

Zachary’s FROZEN party was a couple of weeks ago, and was a hit with everyone. I had a ball creating it, he had a ball helping me and his friends had a blast too.

This is a long post, but I wanted to capture everything I did complete with links to everything you will need to create your own Winter Wonderland or Frozen party. If you didn’t see part one, you can read about it here.

THE DECOR

I used Pinterest as a way of collecting inspiration and created a board dedicated to all things Frozen. You can see my board here.

Juggling many balls in the air, I started working on many of these items some time ago. I even squeezed in some time for trial runs of a few food items. The kids had fun helping me in the creation and the food testing department!

I could have very easily done so much more, but I have to draw a line somewhere! Time certainly dictates some of what gets included in events I host, but nobody knows what I had planned except me, so on the day nobody is aware of what didn’t get done 🙂

My Pazzles assignment featured on the blog last month was the start of Zachary’s Frozen themed party decor. I built on this as time went on.

Frozen-Party-Shelf-Display

As the children arrived I had a white streamer curtain hanging in our entrance hall for them to walk through. They loved this! I attached the number 5 pennant pictured above to the centre of the rod and used two mini pom poms at each end.
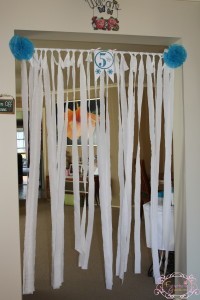
entrance

I wanted the kids to play pin the nose on Olaf, but the actual merchandise for that here is a bit tricky to get hold of. In my usual fashion, I thought “I can make that with my Pazzles!”. So I did! I used a colouring sheet of Olaf and vectorised it in my Inspiration Pro software. I made each piece as big as I could and cut out each section to then be assembled for the children to pin the noses to. I found a printout of Olaf’s noses and printed these onto orange cardstock and cut out freehand. After writing each child’s name on each carrot and attaching Olaf to the wall, this game was ready to go. Olaf is now on Zachary’s bedroom wall with just one carrot stuck to his face.
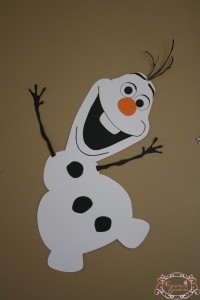
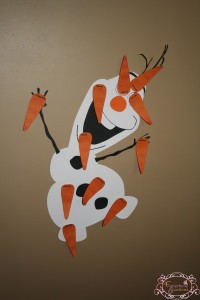
IMG_8797

Olaf with carrots

A really easy and fun project Zachary and I did together was to create a paddle pop snowflake. I saw these on Pinterest, and thought they’d be fun to do, and we could use them for Christmas decorations as well. It was a tad tricky to get all the pieces in place before adding glue, but it was fun to do together. Once the glue was dry, we painted it white. For Christmas I plan to add a large snowflake rosette in the centre sourced from the Pazzles Craft Room.

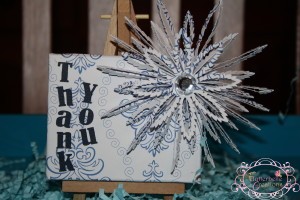
Whilst on the topic of rosette snowflakes, I did cut one out and glued it to a mini canvas I had covered in matching scrapbook paper. This little canvas on it’s mini easel sat on the party favour table. I had planned to add the words ‘thank you’ ready for the party, but had a problem and couldn’t get it done in time. I have since finished it though so you can see the finished product.
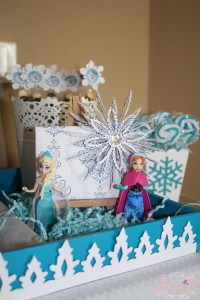
Anna & Elsa sweet table


IMG_9099

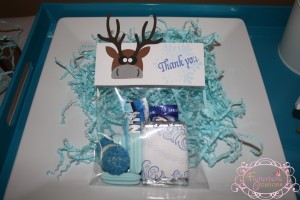
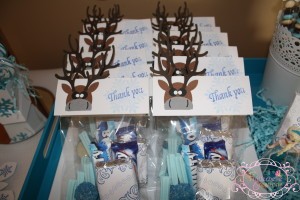
Since Zachary’s favourite characters are Sven and Olaf, I wanted to make sure they featured somehow in his party decor. I altered a reindeer file from the Craft Room to create the toppers for the lollie bags. The toppers were just 5cm x 4cm pieces of white cardstock folded over the top base of the cello bag. By attaching it to the base of the bag it means the recipient can easily open the seal from the opposite end without destroying the topper. After gluing the reindeer faces onto the toppers I stamped a snowflake in light blue followed by a ‘thank you’ stamp in dark blue. These bags were well received by Zachary’s friends.
Sven thank you bags

Reindeer lolly bags

Inside the bags I had made my own white chocolate bars using a Roberts Confectionery mould. The mould has 36 squares of chocolate and so once set and cooled to room temp I cut each block into three equal parts. I then wrapped them neatly in aluminium foil and wrapped a strip of patterned scrapbook paper around it to create custom chocolates.


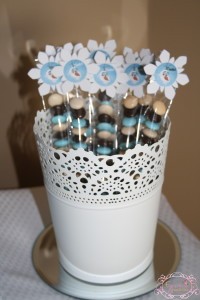
Some new flavoured M&M”s have been released which matched our party theme perfectly – vanilla shake M&M”s which are cream, light blue and dark brown. These were perfect to pop into some small lolly tubes complete with a snowflake topper. I used this snowflake tag file, removing the centre circle. I used the crop photo feature to ‘crop’ Olaf’s face from a saved jpeg image and moved it over the centre of the snowflake. I added the word ‘thanks’ and printed the image onto the snowflakes. I was making these on the morning of Zachary’s party (bad planning on my part!) and made a few silly mistakes which meant they did not come out perfectly. If I wasn’t doing too many things at once this would not have happened! (They still looked cute though).
Lolly tubes

The popcorn boxes I had already created were perfect for a piece of florist foam and some shredded paper in the top to hold the lollipops. I popped the boxes on top of little round mirrors I found in a $2 shop and thought they looked quite smart.
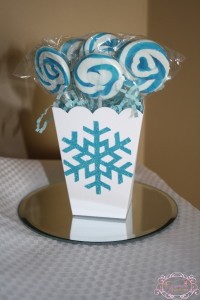
Lollipops

The party favour table was my Nana’s old 1920’s Singer sewing machine with a white table cloth over the top. I attached a few light blue snowflakes to the table cloth for decoration. I printed the Olaf Build a Snowman activity sheet from the Disney website and attached him to the wall with a little message saying Thank You from Zachary.
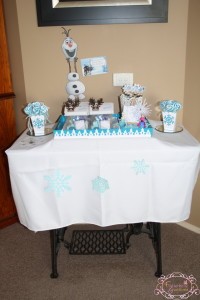
Favour table

The weather was particularly kind to us for the party, so I set up the table outside under our pergola and made use of a simple curtain rod from IKEA to hang a plastic tablecloth from as a backdrop. I hung the paddle pop snowflake from there too.
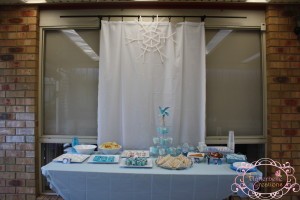
Frozen table

I purchased two white paper lanterns a while ago with the intent of making a snowman to hang out our front door as Zachary’s guests arrived. One medium and one larger lantern tied together with some embellishments cut out using my Inspiration and later my Vue made him look quite cool! This idea courtesy of Pinterest again! I used the same file I had vectorised for pin the nose on Olaf and cut his raisins out of vinyl and the rest out of cardstock. I folded over the end of his arms slightly before taping them onto the top lantern so they would stand up somewhat. This project was heaps of fun 🙂

THE FOOD

Not only do I love creating crafty things, but I also enjoy creating in the kitchen. With Pinterest as my inspiration centre, I had a few fun things to try out. Each Frozen themed item of food had a corresponding food sign. I used these image for the signs adding text using my Pazzles Software. I’ll just share my images of each food item for you.

MELTING OLAF BISCUITS – marie biscuits with icing and marshmallow head!
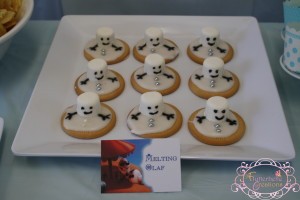
Melting Olaf Biscuits on plate

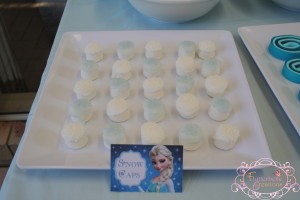
SNOW CAPS – marshmallows dipped in icing and then blue sugar crystals and coconut alternatively.
Snow caps

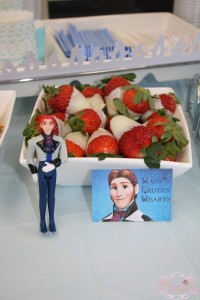
HANS’ FROZEN HEARTS – white chocolate dipped strawberries
Hans' Frozen Hearts

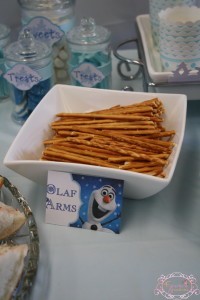
OLAF ARMS – Pretzel sticks

Olaf arms

MELTED OLAF – iced water in the drink dispenser with an Olaf head stuck to the glass and a sign saying ‘Melted Olaf’.

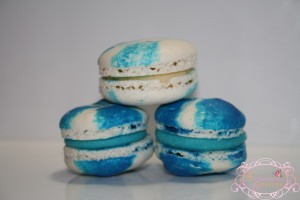
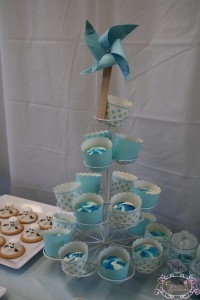
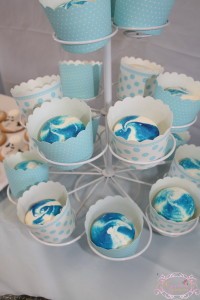
MACARONS – These amazing beauties made by the lovely Lisa from A Macaron Affair are delicious! We had white chocolate ganache in some, and vanilla bean in the others. Lisa coloured the white chocolate ganache blue so we could tell them apart because we had the same shells for both. The blue & white swirl shells made them look great.
Macaron tower - whole

Macaron tower close up

Frozen macarons

OLAF NOSES – Cocktail frankfurts are always a hit at a party with both kids and grown ups!

HANS’ & ANNA’S SANDWICHES – In the song, Love is an open door, Hans & Anna sing about how they finish each others sandwiches.

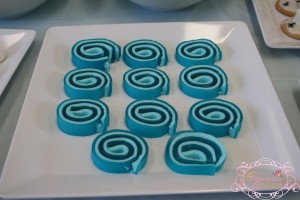
JELLO PINWHEELSSee recipe here

Jello pinwheels

KRISTOFF’S ICE – Little bowls of jelly, can’t get any easier than that.

SNOWMAN MILK BOTTLES WITH DOUGHNUT – Milk bottles with vinyl snowman buttons and mini doughnut with icing sugar
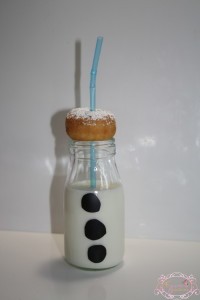
Snowman bottles with doughnuts

ICE CREAM CAKE

I had thought about making an ice-cream cake and when I mentioned it to mum she said she’d like to do it. That was before she broke her shoulder and tore her rotator cuff tendon two months ago and has had two surgeries since then to repair it and now on a long road to recovery. That aside, she and dad (who does not cook) worked together to create this!

Dad has NEVER made a cake, let alone iced one. He certainly has not operated a piping bag! Dad piped every little star onto the surface of Zachary’s ice cream cake and I’m super proud of him! He was of course under very close supervision and guidance of mum, who has made many ice cream cakes over the years for my brother & I as children. When we placed Olaf, Sven & Kristoff into the top along with the number 5 candle it looked great.
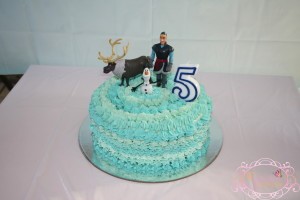
Ice cream cake

THE GAMES

Apart from Pin the Nose on Olaf, the children came up with the idea of playing FROZEN statues and hot potato. Hot potato was altered slightly in that we used a white balloon with Olaf’s head stuck on it!
Everyone had a wonderful afternoon and Zachary is still talking about his Frozen party and asking when he gets another one!

Thank you for reading and looking at my pictures. I look forward to sharing more creations with you all very soon.