Let it Go……

Frozen-Party-Shelf-DisplayZachary’s 5th birthday is just around the corner, and I’ve lost count how many times we’ve listened to the FROZEN soundtrack! He has almost perfect recall of all the lyrics and is OBSESSED with Olaf, Elsa, Anna, Sven & Kristoff! So, of course he requested a FROZEN themed party for his 5th Birthday. All he talks about is his FROZEN party!

I made up a rule in our household that the children don’t have a birthday party every year. It’s my way of teaching them that just because it’s your birthday, doesn’t mean you automatically get a party. It’s something to look forward to, and not a right but a privilege. 1st, 5th, 10th, maybe 13th and then 18th or 21st Birthday parties are on our schedule. The Birthdays in between are celebrated with family and maybe a few close friends for afternoon tea, a meal out or an activity like bowling. So far, so good. Charlotte, being 8 years old is quite at peace with our rule and understands the reason behind it too. There are so many children who never get to have a Birthday party and I want our children to be aware how lucky they are.

So, when they know it’s party year, they get very excited and help out with the decorations and the planning. Let’s face it, mummy loves to decorate and using my Pazzles Inspiration Cutter makes the whole job way more cost effective than buying expensive party decorations and we can customise them to our exact requirements. I find complete joy in the planning and creative process.

So, head on over to the Pazzles blog to read about how I created some lovely FROZEN inspired party décor without being obviously Disney Frozen. Stay tuned for part two where I will share Zachary’s Birthday Party photos with all the fun things I have lined up that don’t appear here yet! This second instalment will have more obviously Disney FROZEN characters!

Check back here in early September after Zachary’s Birthday to see the full creative story!


Beach Party

Beach-Week


It’s Beach Week over at the Pazzles blog, and my contribution is a fun favour bag for a beach party.

It’s Winter here in the land Downunder, so a beach challenge felt a bit strange, but it was fun and I’m happy with the end result.

Head over to the Pazzles blog to read about my project, with extra info featured here on my page.

We’re not really beach goers in our family, the tranquil countryside is more our style, and when it’s hot in summer, air conditioned comfort is where I like to be! Almost sacrilege for an Aussie to not really love going to the beach I guess, but that’s who I am!

I changed my mind many times on what I was going to do with a beach theme, but settled on a fun gift bag that incorporated a few craft room files. It’s fun to do something different and my aim is to inspire people to think outside of the box!

Party favours are fun to make and mixing and matching different files in the same theme makes for a cute project.

This is what my file looked like in my Inspiration Software.

beach party bag

Happy Summer to all my Northern Hemisphere friends and thanks for stopping by – I’m quite shocked and humbled by the number of visitors I’ve had in a short space of time. I look forward to sharing more with you in the future.

Blog signature 2

Oh the places you’ll go……

One of my two challenges for this month was to create a photo mat based on the Pazzles tutorial found in the Craft Room videos – Building on the Basics section. I had watched this some time ago, but hadn’t attempted to create one myself.

So which photo do I choose? What theme will it be? What image will I use? So many questions!

After browsing favourite photos of the children from last year, I settled on one of Charlotte reading in the garden and took my cues from the leaves in the foreground.

Click through to the Pazzles blog to continue reading about creating custom photo mats. Once you’ve done one, you’ll want to do more! I thought it was a bit plain and boring at first, but when I put it all together and took photos in the frame, I was pleasantly surprised by the end result. Sometimes, the simplest projects create more impact.

You could take this project a step further by adding some vinyl lettering with a quote or the date the photo was taken.

If I had enough room I would have added this Dr Seuss quote to the frame.

Dr Suess

I will certainly be doing more of these photo mats to jazz up plain frames around the house. I have a series of three photos of Zachary that need some jazzing up, so all I need is a frame to then go ahead and create my custom mats! In fact, I took one of his pictures out of the frame I used for this project and he got a bit annoyed with me asking where his picture went! I should make it up to him!!!

Happy Crafting everyone, and stay tuned for my next project to appear on the blog next week….think sun & sand….

Blog signature 2

Twist Easel Cards

Pinterest – Oh my goodness, I love this site! I don’t need to have magazines piling up at home to go through for ideas and projects to try…..it’s all stored electronically for me to search through when required. Years ago, I used to collect clippings of all descriptions and have them filed away in categories to refer to when needed. Now it’s all electronic and I’m able to use a search engine instead when looking for something! I absolutely love being able to draw inspiration from some very talented people around the globe and try to recreate some of their work with my own spin on it.

There are many cards I have pinned thinking ‘I can do that!’ So, I go away and figure out how to do it and make it a reality. The Twist Easel cards grabbed my attention a while ago and so when mum asked me for another birthday card for one of her dear friends, I knew that testing out something new was just the inspiration I needed.

Then Angie’s Mother’s Day card appeared on the Pazzles blog, and I was inspired by the petal square file she used to make her easel card. I knew I had downloaded it already so I grabbed it and went to work.

twist easel colourThis card looks great, and I’m very proud of it, even if I say so myself! It looks fancy without needing any fancy techniques to create it. I didn’t have any cutting files for the base of the card so I simply drew a rectangle in my software about 11″ high and 5.5″ wide. I wanted it a touch under 12″ x 6″ so I didn’t have any issues getting it into a square envelope when it was folded.

I then created a kiss cut line across the middle of the card from left to right and then a diagonal kiss cut line from the bottom left to the top right of the top section of the card. This created the necessary folds, but would be just as easy to make without a cutting machine, using your craft knife and scoring tool.

I chose pale blue cardstock for the base and co-ordinated the whole look with Kaisercraft’s discontinued Blae & Ivy Collection. The friendship quote was from the page ‘Valley’ and the blue embossed paper came out of the 6 x 6 paper pad from the same collection. The striped paper cut into the triangle was also from the paper pad.

The flower was layered up by using the petal cut outs from the petal square (no scraps here!) All I needed to do was ink the edges of each piece and curl them slightly around a pencil and then using double sided tape put the whole thing together, and finished it with a resin flower button.


A small paper doily made a nice base for the Happy Birthday message printed onto the die cut scallop taken out of the 6 x 6 paper pad.

The delicate Kaisercraft lace with a strip of pearls over it gave a feminine touch. The pale blue paper flower looks great with the Bella bling flower in the centre. The dimensional paper bow also came from the Pazzles craft room and this is the first time I’ve used it – why didn’t I try this earlier?! I love it! I did only use one layer of the file though. Friend twist easel card

The other twist easel card I created that weekend was for my almost 92 year old Grandmother for Mother’s Day. She was suitably impressed by her pretty card, and she wasn’t expecting it either.

Oma's twist easel

The purple and yellow colour combo makes me smile and feel cheery! The beautiful pattern of the paper makes you happy too. Another double sided Kaisercraft paper (I have a fair few in my paper collection!) from the Lilac Avenue Collection. This paper was Wisteria. (P420)

The scallop circle doily and the dimensional bow were the only two craft room files required for this card in addition to my cutting file for the base. I simply drew a circle smaller than the middle of the scallop circle and printed the message onto it.

Some strategically placed pearls propped up the card for display purposes, and a little lace bow prettied it up even more.

I hope I have inspired you to create some twist easel cards – they really are so easy, but give a wow factor for the recipient, and their friends when they see it proudly displayed on their mantel.

Happy Crafting!

Blog signature 2

We live as long as we’re remembered

Pa – a man who made such an impact on my life, and one whom I miss so terribly, even after almost 18 years since his passing.

I miss him even more now that I’m working in the business he worked so hard to build and want to ask him so many questions about it! I wish he was here to spoil his great grandchildren as he did us as kids, and to just be a part of our lives. But he isn’t – and so we preserve the memories we have for future generations to connect with…..I’m on a mission to write a story about each of our family members for our children to treasure. A family tree is nice, but it doesn’t tell stories behind each person – their personalities, their occupations etc. I love hearing my parents tell stories of their relatives, and we need to preserve these stories for future generations to enjoy and marvel over.

I am grateful to have been chosen as a Design Team member for Pazzles for many reasons, but the one I’m most grateful for is that it’s ‘forcing’ me to complete projects I’ve had on my ‘to-do’ list for ages and haven’t gotten around to them, or put them off for one reason or another.

The May Challenge on the Pazzles blog is to create a project using the world around us as inspiration.

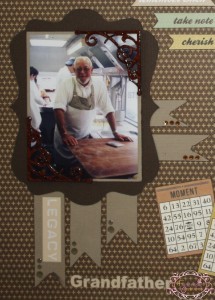
As I was going about my day, I thought about one of Pa’s caps I have in my wardrobe. I grabbed it out and took some photos. I’ve been meaning to do a page as a tribute to Pa for years…..this was my inpsiration and push to finally do it! I had already chosen a photo to use so it was just a matter of designing the layout and putting everything together.

I use the Inspiration Studio Pro software to design the entire layout. I love the Pro Software feature of being able to see the mat on the screen and I use the lines as guides for everything.

Once all the elements come together, I essentially have a sketch of my layout.

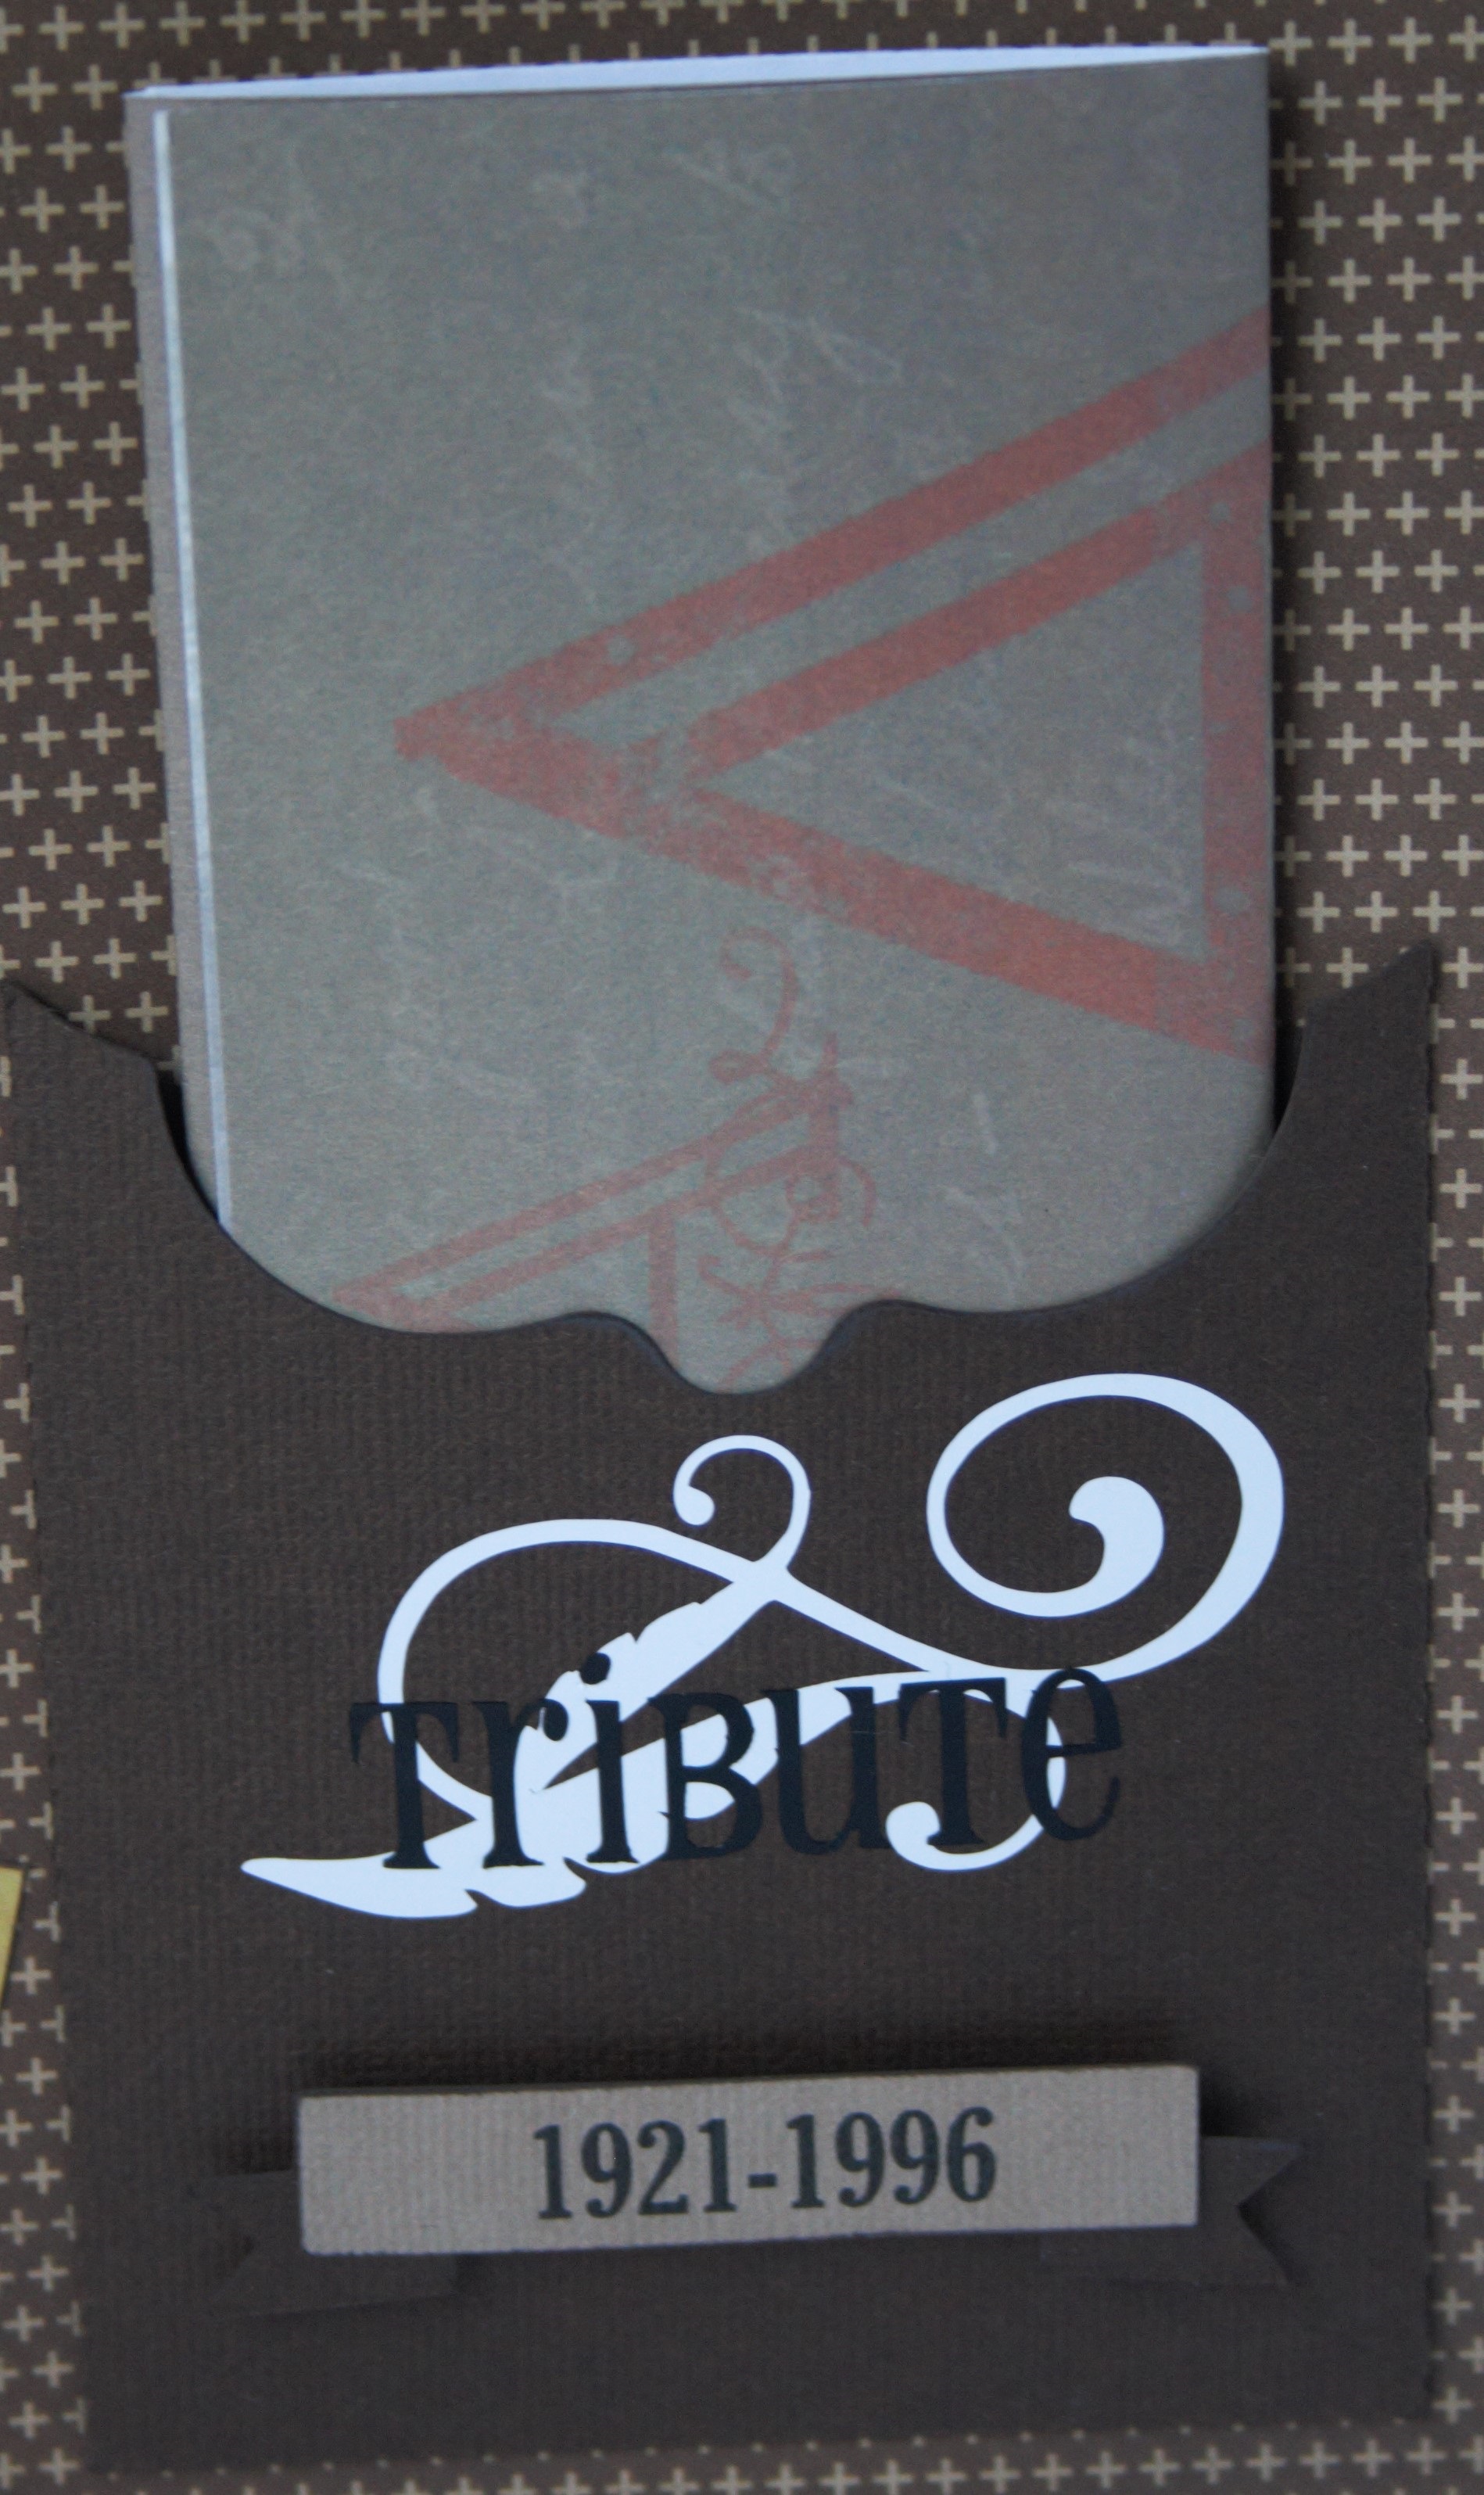
The journaling pocket was created with the pocket card file and decorated with white vinyl cut from the flourishes set of 7 Miss Kate Cuttables file available in the Pazzles Craft Room. I used Pharmacy font for the word Tribute and cut it out in black vinyl. This is a good way to use up some of your scraps. I can’t stand throwing out offcuts, and use them any way I can!

I printed my speech from Pa’s funeral service on the white side of the patterned paper so I could fold it with the initial “A” showing in the pocket. (Pa’s name was Arnold) This paper was hiding in my stash and it was a freebie with one of my magazine subscriptions from years ago!

Tribute pocketPa's photo with borderThe Kaisercraft wooden flourishes I used were coloured with my new KAISERFusion markers. I used one of the browns (BR05) and then once dry, I grabbed my trusty Dimensional Magic to give them the extra wow. I’m so pleased with how they dried, they look like real timber with a glossy varnish finish.

The background paper was from the Kaisercraft Take Note collection and so are the die cut embellishments. The frame, the words, the clock and the little calendars fit into my page really nicely without too much thinking.

I had some rubons lying around, so found a couple of spots for them too. The quote ‘We live as long as we’re remembered’ was in fact a rub on placed directly onto the patterned paper. It looked okay, but when I tried to photograph the page, it was really hard to see. To fix this little ‘problem’ I decided to grab another craft room file for a base and print the text directly onto that and cover up the rubon. It worked! Mistakes are sometimes a blessing in disguise to make a project better 🙂

The banner for his birth & death dates was a Miss Kate Cuttable file also from the craft room. I left out the two small pieces from each side giving the shadow effect, but made sure I inked the edges and raised the dates up on foam squares so it wasn’t ‘boring’ and flat!

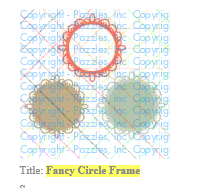
The banners and scallop frame ‘framing’ Pa’s photo were re-sized to fit and came from the craft room again – the scallop mat and the pocket scrapbooking banners of which I just used the base of the file.

This page will be framed to be added to our family photo gallery instead of being hidden in an album.

I could write a whole other blog post about my Pa, but it would be very long, and would take me a long time to type through my tears!

I wish that everyone had the opportunity to know their grandparents in the same way I did, and have that amazing relationship with them that is unlike any other. I was so lucky to know and love all four of my grandparents, and my Dad’s mum (Oma) is now almost 92! Hopefully one day, we will graduate to become grandparents and be able to be amazing people in the lives of our precious grandchildren, imparting our wisdom and humour into their world.

Don’t wait to create a tribute to a loved one – whether still here or passed. These layouts we create will be kept by our children and treasured as lasting memories of events and the people we are, all with our own unique personalities and stories.

Thanks for stopping by.

Blog signature 2


Mother’s Day Cards

I was asked to create a couple of Mother’s Day cards by a friend, and since I haven’t tried all of the Fun Folds 2 Collection yet decided these were the cards I was going to use for my bases. Trying new files is so much fun.

I chose the diamond fold and the shutter card bases both available free to Pazzles craft room members.

Often, when I sit down to create my cards I have no idea how they’re going to look when I’m finished. I create as a I go, and let the papers I choose guide me, or my customer’s brief of specific colour or theme. For these cards, one was to feature purple and the other was up to me.

Both of these cards fit onto one piece of 12×12 cardstock so I cut them both at the same time. After choosing complimentary patterned papers from the Kaisercraft Magic Happens Collection. The patterned bases were quick & easy for my Inspiration to cut too and the fun part begins – assembly!

I did have to sit and think for a moment first about how to fold the diamond card, but once I referred back to the image in the craft room library I figured it out!

I always like to ink the edges of my papers to give extra dimension to the pieces. When they haven’t been inked, I feel they don’t look as good. I love my little Versa Color Ink cubes and find them easy to use and great to store as they stack on top of each other.

The diamond fold card looked very impressive just with the patterned pieces added! I wanted to make this card pop with simplicity. I chose the fancy circle frame to cut in plain cardstock and then used the circle for my Mother’s Day message. All the text is added in my Inspiration Studio Software making the whole process seamless being able to use one program.

fancy circle frame craft room

Adding some flowers and a very light lilac bow finished this card off beautifully. I cut another diamond in co-ordinating paper for my friend to write her message on before fixing it to the back of the card. This way, you’re not writing on a bumpy surface because the card is three dimensional.

IMG_8373


IMG_8370

For the shutter card, I decided against using the plain oval and opted instead for my favourite vintage frame. Cutting a contrasting coloured oval for the Mother’s Day message and adding a Miss Kate Cuttables flourish above the text gave an added touch.

The flowers on either side were created by using the Yellow Layered Flower file from the craft room. Once cut out, I inked the edges roughly and then curled the petals around a pencil. Fixing each layer with double sided tape and finishing off with a Kaisercraft sparklet in the centre of each flower meant this card was now finished. For the personalised message I cut a square piece of cardstock in the same green I used for the mats to be included in the envelope. This card doesn’t have much room for writing so it’s easy to include a piece of cardstock instead for the personal message.

IMG_8365

I hope seeing my cards has shown you how easy it is to make gorgeous cards with these great files from Pazzles! You are only limited by your imagination. I absolutely love how the Inpsiration Cutter can create so many custom embellishments. This is one of the main reasons I purchased it back in 2011 and now I’m busting to get my new Inspiration Vue when it’s available!!! I’ve chosen purple!

Vue colours

Thank you for reading, and stay tuned for my twist easel cards I made this weekend just gone. I love them! In the meantime, search for twist easel cards on Pinterest, there are some amazing cards on there.

Blog signature 2

Tri Shutter Mother’s Day Card

My first official Pazzles Design Team Project was to create something in my own theme. With Mother’s Day this weekend, I thought a Mother’s Day card would be the perfect fit.

It was just the excuse I needed to try out one of the new Fun Folds cards in the second Fun Folds 2 collection available to craft room members for free in the Pazzles Craft Room or for purchase through the Pazzles store.

I love these cards because they are something a bit different, and with numerous ‘faces’ to decorate, there are so many possibilities for embellishing them.

Head on over to the Pazzles blog and read about my Mother’s Day Tri – Shutter Card.

Mothers-Day-Tri-Shutter-Card-BD

Pazzles Project – Tri-Shutter Mother’s Day

To all the mums, today is the day when we get to say an extra special thank you for everything you do, everything you have done and everything you will do for us, and with us in the future. This role of a mum is one of the hardest gigs ever, and I don’t think we truly understand the enormity of it until we actually become mums ourselves. It is also the day when we mums get to have a bit of extra attention, and hopefully most of the day ‘off’ from our usual duties! I hope all the mums got at least a little piece of a ‘day off’ today!

I was lucky enough to shower on my own (highlight!), and to have a strong cup of tea waiting for me on the kitchen table with my gifts and cards. I am not a fan of breakfast in bed so this was how I liked it! I leisurely ate my cereal and quizzed the children about their favourite recipes I make to be able to fill in the cute little recipe book Charlotte purchased from the Mother’s Day stall at school. I will handwrite these recipes, so she has this book forever with my handwriting. I will get my mum to handwrite her recipes as well.

I did a spot of baking before going around to my parent’s house to enjoy a beautiful spread of afternoon tea put on by my mum. My grandmother, parents, my Auntie & Uncle, two very close family friends & my little family enjoyed an afternoon indulging our tummies and enjoying each other’s company. A lovely day was had by all.

IMG_8414


I have a slight obsession for collecting quotes, and this is one that I have always loved – even before having my first child.

Making the decision to have a child is momentous. It is to decide to forever have your heart go walking around outside your body!

~ Elizabeth Stone

So, Happy Mother’s Day!

Blog signature 2

Easter Craft

Easter Milk Cartons

I’ve been exploring the Pazzles Craft Room Library lately to find awesome dimensional projects to try out, and I’ve been searching online for great templates that I can recreate in my Pazzles Inspiration Studio software. When I see templates online or in magazines, I wonder how I can recreate them in my software so my machine can work it’s magic and do all the hard work! I also love how I can tweak the templates to suit my requirements.

I came across this adorable milk carton file and thought it would make the perfect Easter craft. All I needed was the base template.

Mum had rung me and asked me to create some name tags to personalise our staff gifts for Easter, but when I came across these, I suggested I make them in a custom size to fit the chocolates she had already purchased instead of using cello bags. We’re quite pleased with how they came out and our staff loved them.

After selecting some soft colours that weren’t too feminine for our mostly male crew, I set my PI to cut away. I fit two of these per 12 x 12 scrapbook page. Each side of the carton measured about 5cm across and high.

Folding them was a  piece of cake and I used double sided tape to assemble them.

I measured the face of each assembled carton so I could mark out some patterned paper to wrap around each one for decoration. I couldn’t find any soft paper in my stash, so the card stock I chose needed some scored lines to help it fold neatly around my milk carton. I then inked the edges of each ‘wrap’ to make them stand out.

I wrapped each carton carefully, using double sided tape again and then went to work on the Happy Easter label.

I picked out the ‘Happy Easter’ from the Easter Pop Up Card Box blog entry on 28 March 2014 and added our staff names to it in my Inspiration Software.

I cut the outline and then after printing all 6 of them on a regular sheet of paper I stuck each piece over the top and then removed the outline to print again, but this time on the shaped cardstock. This is my preferred method for print and cut, I cut & print instead. (I can’t wait for the the new Inspiration Vue with it’s optical eye for precision print & cut!)

New Vue in 4 colours

Once this was done I used foam squares to secure the Happy Easter to the front, and put a tiny wooden peg on top to close the carton and they were finished!

I’m looking forward to creating more of these as party favours or place settings at a dinner party. To see some of my other party favours, please visit my Facebook page as well as my gallery.

Blog signature 2

Rubber band madness!

Here in Australia, we tend to be a bit behind when it comes to the latest craze. Having traveled to the USA a few times it always amazes me how long it takes for things to be released in Australia. The Rainbow Loom is no exception! We seem to only just have really caught on to it.

My daughter, Charlotte (Miss 8) was coming home from school with coloured elastic bands from friends and making the beginning of little bracelets on her fingers, practically cutting off the circulation.

I had secretly been on the lookout for this sought after Rainbow Loom in the shops, and of course everyone had sold out, and they were wait-listed.

One afternoon trip to Spotlight after a piano lesson, we were standing in line ready to pay when Charlotte spotted people in front of us with the Rainbow Loom boxes. “Mum, Mum! They’ve got Rainbow Looms!” she exclaimed with pure excitement. We asked these perfect strangers where in the store they found them, and promptly made our way there.

To our delight, we found a crate full of them – and they were $10 cheaper than everywhere else! We purchased two – one for Charlotte and one for a friend whose Birthday was coming up.

We’ve shared some really great crafting moments together creating these great little bracelets. Charlotte has certainly inherited my craft gene and it makes me proud to be able to share a passion with her.

A friend shared a link on Facebook yesterday afternoon for the Hibiscus Flower bracelet which she and her daughter had made. I had seen them on Pinterest and wanted to try one with Charlotte. We looked up the tutorial and after dinner tonight, we had a blast creating together. It was tricky at first for Charlotte, but we tackled it together and completed it with smiles on both our faces.

Spending precious time together making memories as mother and daughter is something we don’t do often enough in our rushed world. We need to structure time to do these little projects together, and next on our list are some little Kaisercraft bookend drawers that will house Charlotte’s hair accessories. They’ve been sitting in my craft room half finished for longer than I care to admit! Every crafter has unfinished projects don’t they?!


Hibiscus flower r_loom


A New Adventure

Welcome to my first official blog entry for Flutterbelle Creations. I have been thinking about doing this for ages but didn’t know where to start! Sometimes life delivers you a nudge and a couple of weeks ago I got that nudge!

I had applied to the Pazzles call out to become a Design Team Member back in February, almost like a personal challenge for myself. When I read the blog entry calling out for new DT members I squealed with delight and said “I want to do that!” I never thought for a moment that I would ever be selected, but I had to try. 

I have to credit Karen Main Online for giving me the courage to apply for the Design Team member as I read Karen’s blog regularly and many of her posts made me think more and more about doing more with Flutterbelle Creations. This blog entry was one where I felt the urge to challenge myself. 

I was notified by email of my achievement. That humble little email started with the words – Congratulations! You have been selected as the newest Design Team Member!!! I’m sorry – WHAT?!!! Are they kidding? Is this really happening? I squealed with delight and surprise and woke my dozing hubbie from that blissful place when you’re just about asleep! Oops…

Not only do I have the privilege of being a design team member for the next 12 months with Pazzles, but I will be sent equipment to help complete my assignments, and the most exciting news of all is that I will receive a new Inspiration Vue when they become available! This is the newest version of the machine I already have, so that news extracted yet another squeal of disbelief and excitement!

I cannot wait to be part of the Design Team and share my designs with a wider community. Being a design team member is something I’ve dreamed about, and now it’s actually happening. I’m eager to expand my knowledge base and learn many new techniques.

Please visit me on Facebook, and Pinterest and stay tuned to my blog to stay up to date with all Pazzles has to offer and I will also share my own personal projects as well.

I will still be taking custom orders for cards, keepsakes and party decor, so feel free to email me your requirements or questions.

Thanks for reading, and I look forward to embarking on an exciting new journey doing something I love.

Blog signature 2